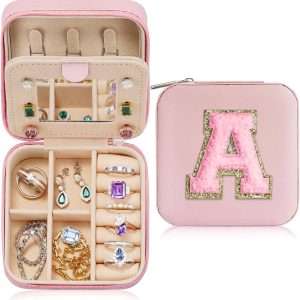
The Ultimate Guide to Creating a Customized Jewelry Organizer: How to Organize Your Accessories in Style
Have you ever tangled necklaces or searched for missing earrings in a jumbled mess trying to find them? Now is the time to take control of your accessories and create a customized jewelry organizer that keeps your items safe and adds a sense of style. With this ultimate guide, you’ll learn how to craft a jewelry organizer that suits your unique needs and aesthetic preferences. Say goodbye to clutter and hello to organized elegance!
A step-by-step guide to creating a customized jewelry organizer
Let’s dive into the exciting process of creating your personalized jewelry organizer! The first step is to gather all the necessary materials and tools. Consider using wood, hooks, paint, and measuring tape for a customized touch.
Next, measure your space and design your organizer. Consider how many compartments you need for earrings, necklaces, rings, and bracelets. Visualize the layout before proceeding to the next step.
It’s time to bring your vision to life by cutting the materials according to your measurements. Sand down any rough edges for a polished finish. Get creative with painting or staining to add a pop of color, or keep it classic with natural wood tones.
With these foundational steps in mind, you’re well on your way to crafting a stunning personalized jewelry organizer that keeps your accessories in order and showcases your unique style and creativity!
Choosing the suitable materials and tools
When creating a personalized jewelry organizer, choosing the suitable materials and tools is critical to achieving a functional and aesthetically pleasing result. Start by selecting sturdy materials, such as wood or acrylic, that can withstand the weight of your accessories.
Consider the overall design you have in mind—do you prefer a minimalist look or something more ornate? This will guide your choice of materials. Essential tools like a saw for cutting the materials to size, sandpaper for smoothing rough edges, and paint or stain for adding color are crucial.
Don’t forget about more minor details like hooks or knobs for hanging necklaces and bracelets, as well as compartments for rings and earrings. By carefully considering each material and tool needed for your project, you’re one step closer to creating a customized jewelry organizer that suits your style perfectly.
Measuring and planning the design
Precise measurements and thoughtful planning are essential when creating a customized jewelry organizer. Before cutting your materials, measure the space where you plan to place your organizer. Consider the size of your jewelry collection and how you want everything arranged.
Sketching out a design can help you visualize how each component will fit together. Consider incorporating different compartments for necklaces, earrings, bracelets, and rings. Planning will ensure that your organizer looks stylish and functions efficiently.
Double-check your measurements before cutting the materials once you have finalized your design on paper. Accuracy is crucial in this step to avoid any errors or rework later on. Remember, proper planning now will save you time and frustration as you bring your personalized jewelry organizer to life!
Cutting, sanding, and painting the materials
After cutting, sanding, and painting the materials according to your design plan, you will have a personalized jewelry organizer that serves its practical purpose and adds a touch of style to your space. By creating a customized organizer tailored to your needs and preferences, you can ensure that your accessories are always easy to find and beautifully displayed. So gather your materials, get creative with the design, and enjoy organizing your jewelry in style!


